
In the sprawling battlegrounds of PUBG, where survival depends on split-second decisions and smart tactics, bridges become war zones. Picture this: you’re crossing a narrow structure, anticipating enemy fire from the other side while your heartbeat races faster than your character. It’s a reality every player faces. Understanding how to navigate these treacherous spans is essential for anyone looking to up their game. So, buckle up. This guide dives deep into the strategic significance of bridges in PUBG, so you can leap over your foes like a pro rather than face-planting into the river of defeat.
Understanding Bridges in PUBG
Role of Bridges in Gameplay
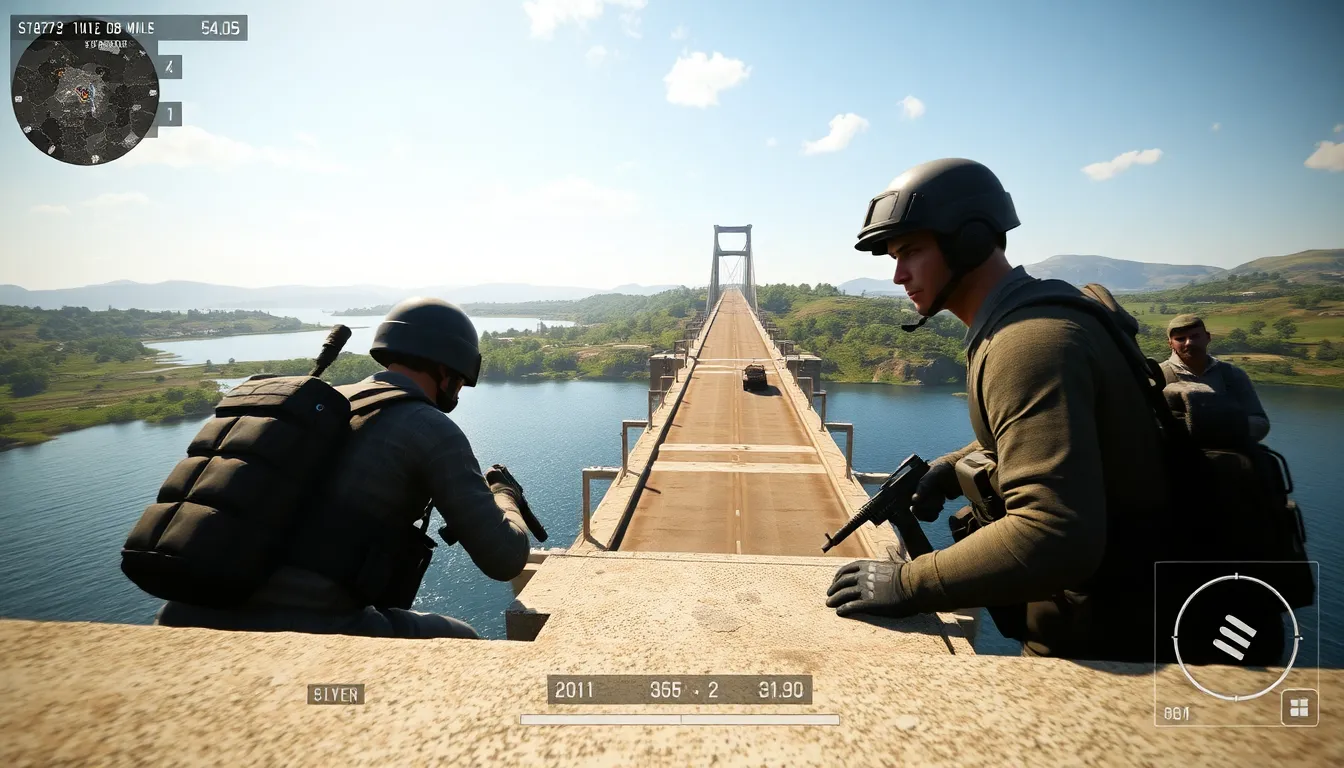
Bridges are not just architectural features in PUBG: they are pivotal terrain for players wishing to dominate. Often serving as choke points between areas, they force players to make tactical decisions. Crossing a bridge can mean imminent victory or the end of one’s game. Vehicles might serve as speedy transit, but strategies must be meticulous, or a careless player might find themselves eliminated in seconds. Every bridge presents opportunities for ambushes or escapes, making them critical to understand and leverage effectively.
Strategic Importance of Bridge Locations
Popular Bridges Across Erangel and Miramar
Bridges in Erangel are mainly known for their strategic placements. The Milta and the Razok bridges connect crucial regions that often attract intense firefights, especially in the late game. Meanwhile, the Puerto Paraiso bridge in Miramar adds a different flavor to encounters. Each bridge serves as a focal point for tactical skirmishes, making it essential for players to know the geography involved.
Key Features of Each Bridge
Every bridge has distinct features. For example, the Milta Bridge is wide and easy to traverse, but its length makes it a prime target for snipers. Conversely, the Razok Bridge has a lower profile that can provide some cover but limits vehicle movement. Learning the ins and outs of these bridges can mean the difference between life and death in a firefight.
Combat Strategies for Bridge Encounters
Using Vehicles for Strategic Advantage
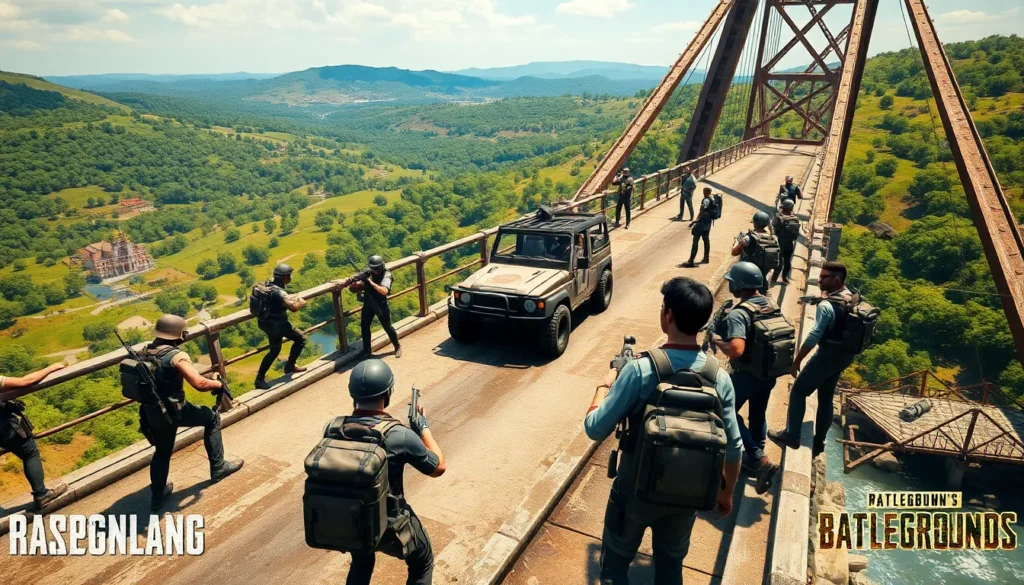
Vehicles can be both a boon and a challenge when crossing bridges. Players can use them to gain a speed advantage, but they also attract gunfire like moths to a flame. Smart players deploy vehicles as shields, driving them halfway across, providing cover while disembarking. Choosing the right vehicle can tip the scales, allowing players to push through while retreating into the safety of their steel chariots if need be.
Defensive Positions on Bridges
Players should take full advantage of the cover that bridges offer. Using the railings and structures, they can create choke points, ambushing unsuspecting adversaries. Establishing a solid defensive position by peeking and firing from behind cover minimizes exposure. Also, watching the enemy’s movements from advantageous spots can create openings for coordinated team attacks.
Tips for Surviving Bridge Fights
Common Mistakes Players Make
Jumping carelessly onto a bridge can be a fatal error. Many players rush, neglecting to survey their surroundings for hidden foes. Patience plays a significant role here: waiting for the right moment often means the difference between securing a kill and meeting an untimely demise. Besides, relying solely on vehicles can backfire, players must remember that they are still vulnerable outside their metal fortresses.
Best Practices for Bridge Crossing
Cohesion with Team Strategies
Communication is essential during bridge encounters. Teams should coordinate their movements, using assigned roles to cover allies effectively. One player can act as a scout, ensuring the path is clear, while another provides sniper support from a distance. Establishing a unified front will help players navigate the chaotic landscape that bridges often create, making them less likely to be overwhelmed.